Appearance
Getting Started
By the end of this page you'll have built a small workflow by hand, run it once yourself, and set it to run automatically in the background every few seconds. It assumes you've already finished Installation.
Open Aerini
The first time you open Aerini, a welcome dialog appears with two options: load a working example, or start from nothing. Choose Start with a blank canvas. Building one yourself, even a simple one, teaches you the parts a lot faster than reading about a finished example would.
You'll land on the main screen: a canvas filling most of the window, and a sidebar on the left listing every available node, grouped by category.
Step 1: Add a trigger
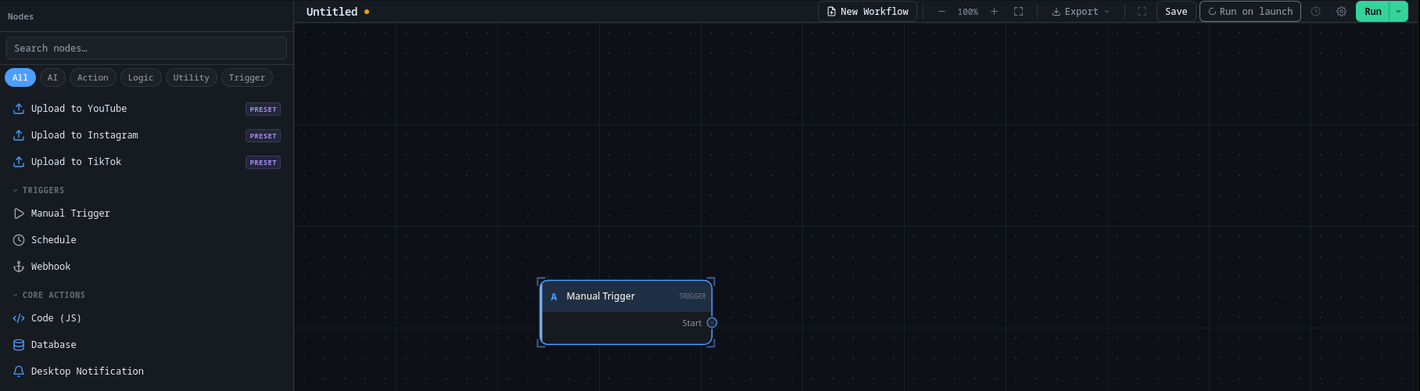
Every workflow starts with a trigger, the node that decides when the rest of it runs. In the sidebar, under Triggers, find Manual Trigger and click it to place it on the canvas. This one starts a run only when you tell it to, which makes it the right choice while you're still building and testing.
Step 2: Add something for it to do
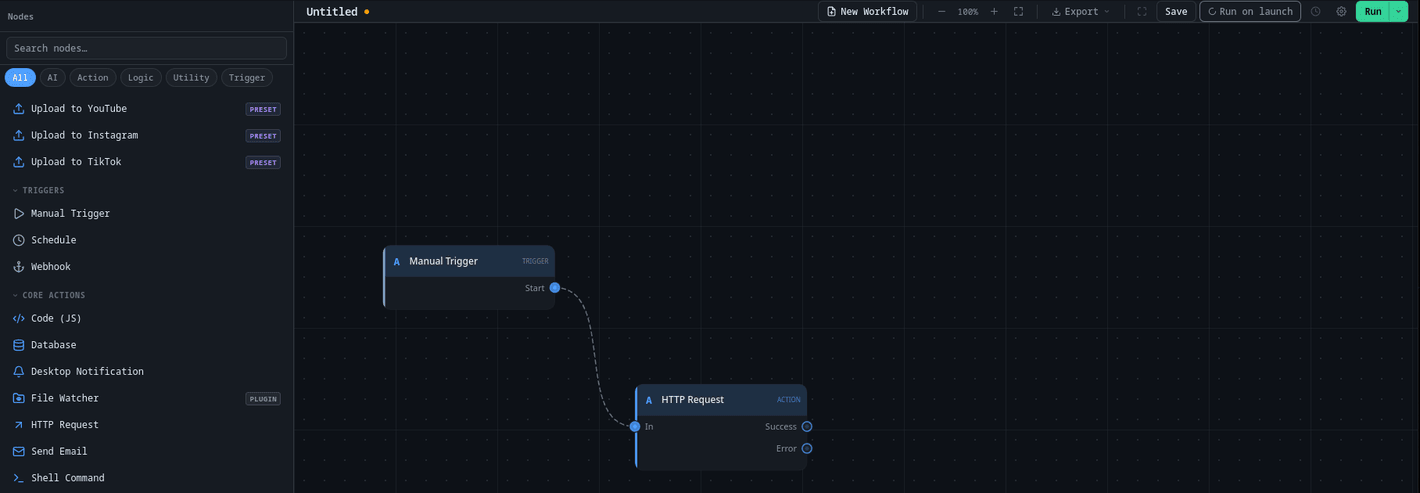
Under Core Actions in the sidebar, find HTTP Request and click it. Aerini places new nodes to the right of whatever you added last, so it should land right next to Manual Trigger with no dragging needed.
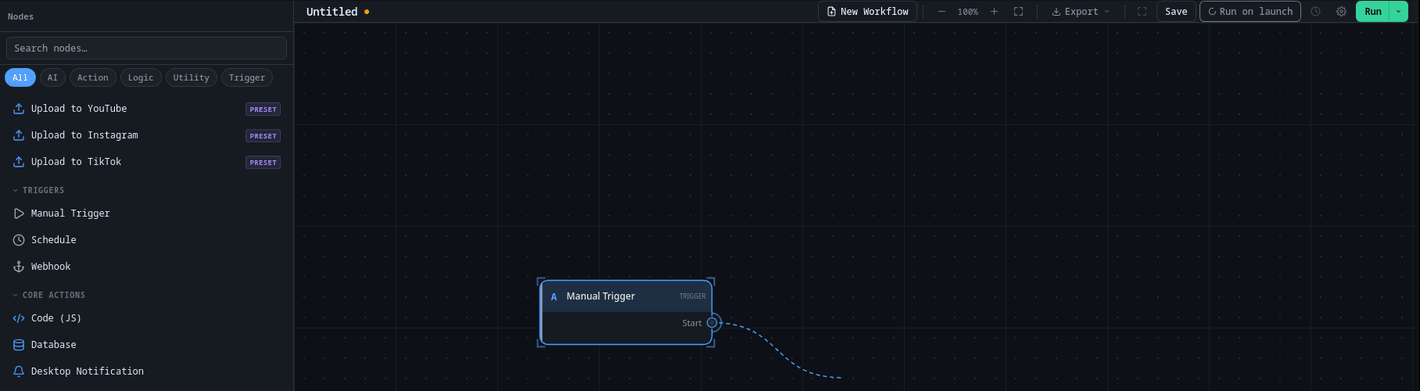
Connect the two: drag from the small dot on the right edge of Manual Trigger to the matching dot on the left edge of HTTP Request. That connection is what tells Aerini which node runs next.
TIP
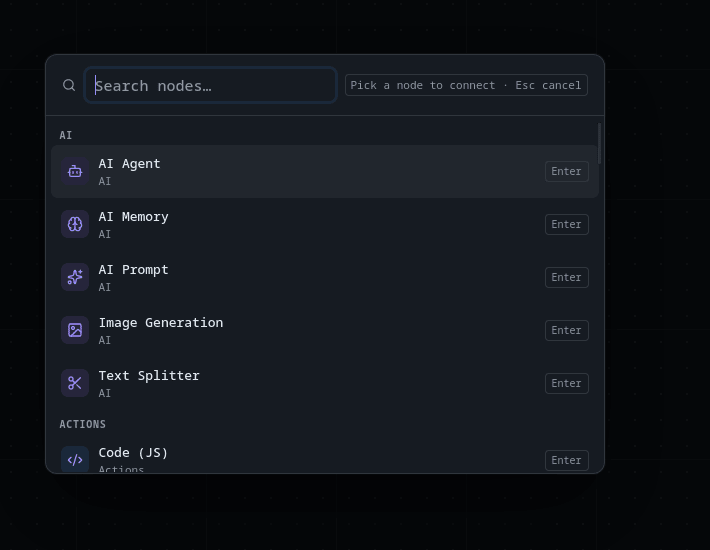
If you drag a connection out and release it over empty canvas instead of an existing node, Aerini opens a small search popover so you can pick a new node and place it, already connected, in one motion. Handy once you're adding nodes faster than you're arranging them.
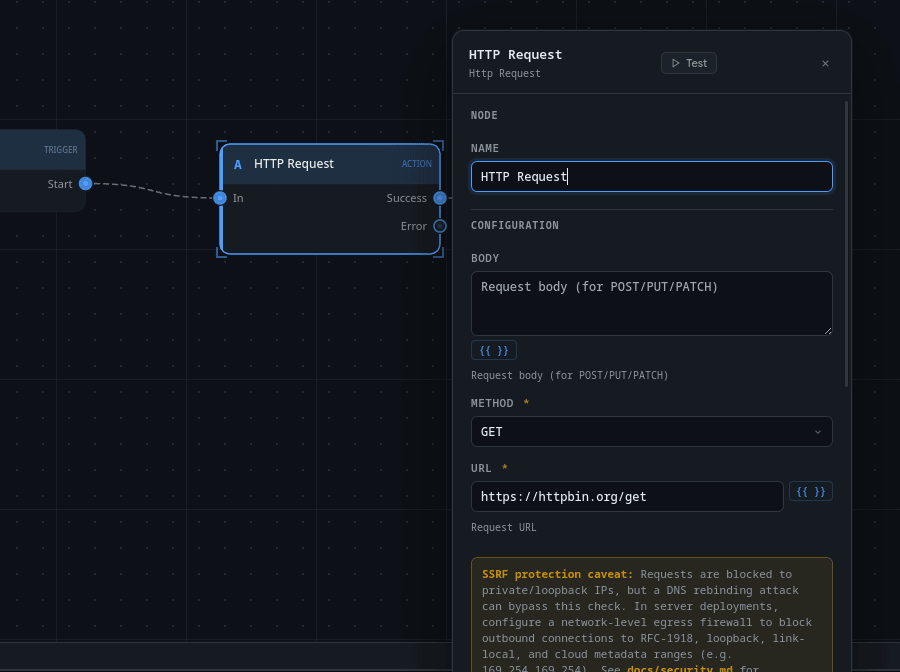
Double-click HTTP Request to open its settings. Set URL to https://httpbin.org/get and leave Method as GET. httpbin.org is a small public service built for exactly this: it just echoes back whatever request you send it, so you get a real response without needing an account or an API key anywhere.
Step 3: Add somewhere to see the result
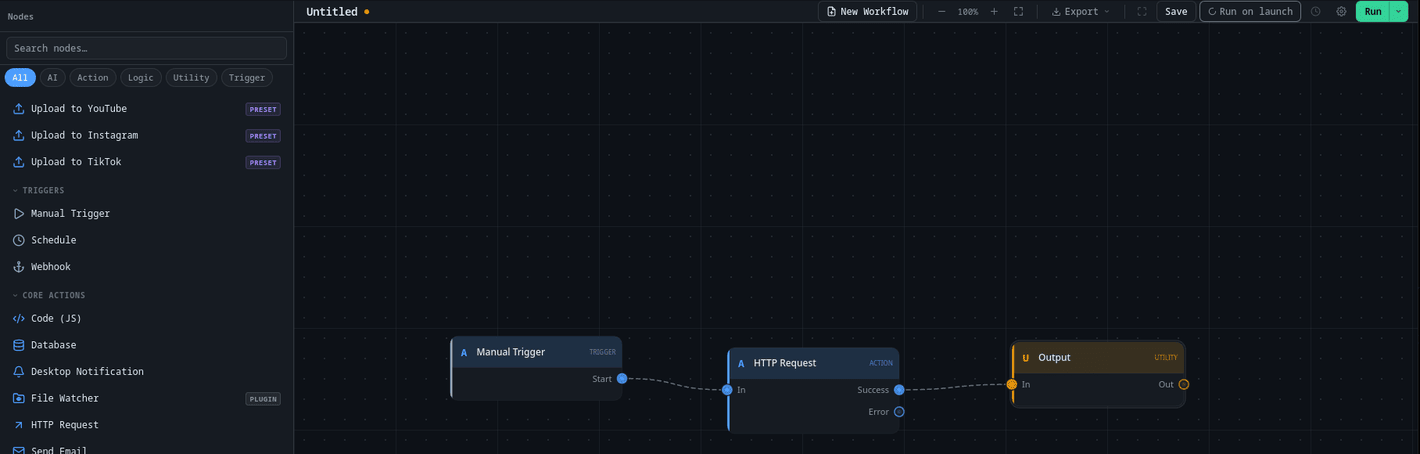
Under Utility, find Output and click it the same way. Connect it too: right dot of HTTP Request to left dot of Output. Its job is to mark the final result of the workflow. You can leave its Label setting blank; it shows as "Result" by default.
You should now have three boxes in a row, wired together: Manual Trigger, HTTP Request, Output.
Step 4: Save it
Press Ctrl+S (Cmd+S on macOS). Since this workflow doesn't have a name yet, the title at the top left of the toolbar turns into an editable text box with its current text already selected.
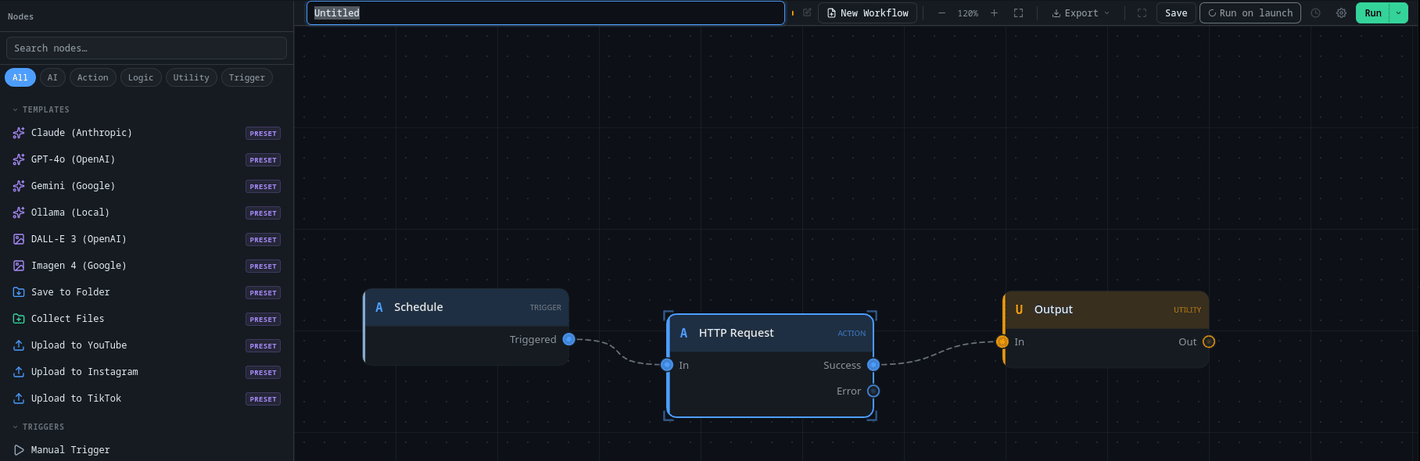
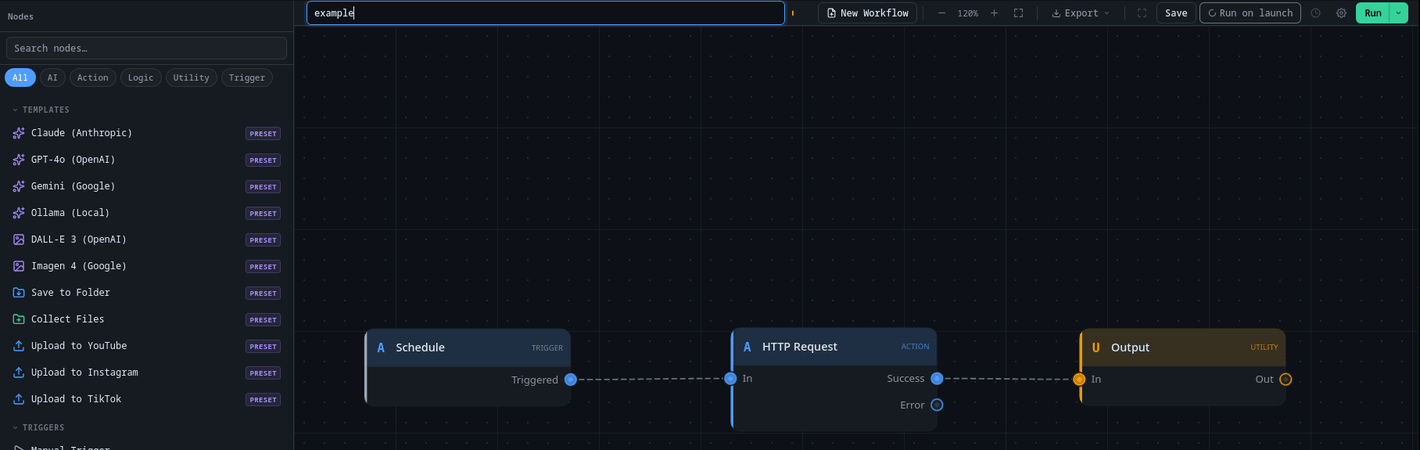
Type a name, for example My First Workflow, and press Enter.
Step 5: Run it
Click Run in the top right. Aerini executes the three nodes in order, and within a second or two each one shows a short preview of its own output right on the canvas. Output's preview should show the JSON body httpbin.org sent back, including the URL it received and the headers your request carried. If a node fails instead, you'll see a small alert icon on it rather than a preview.
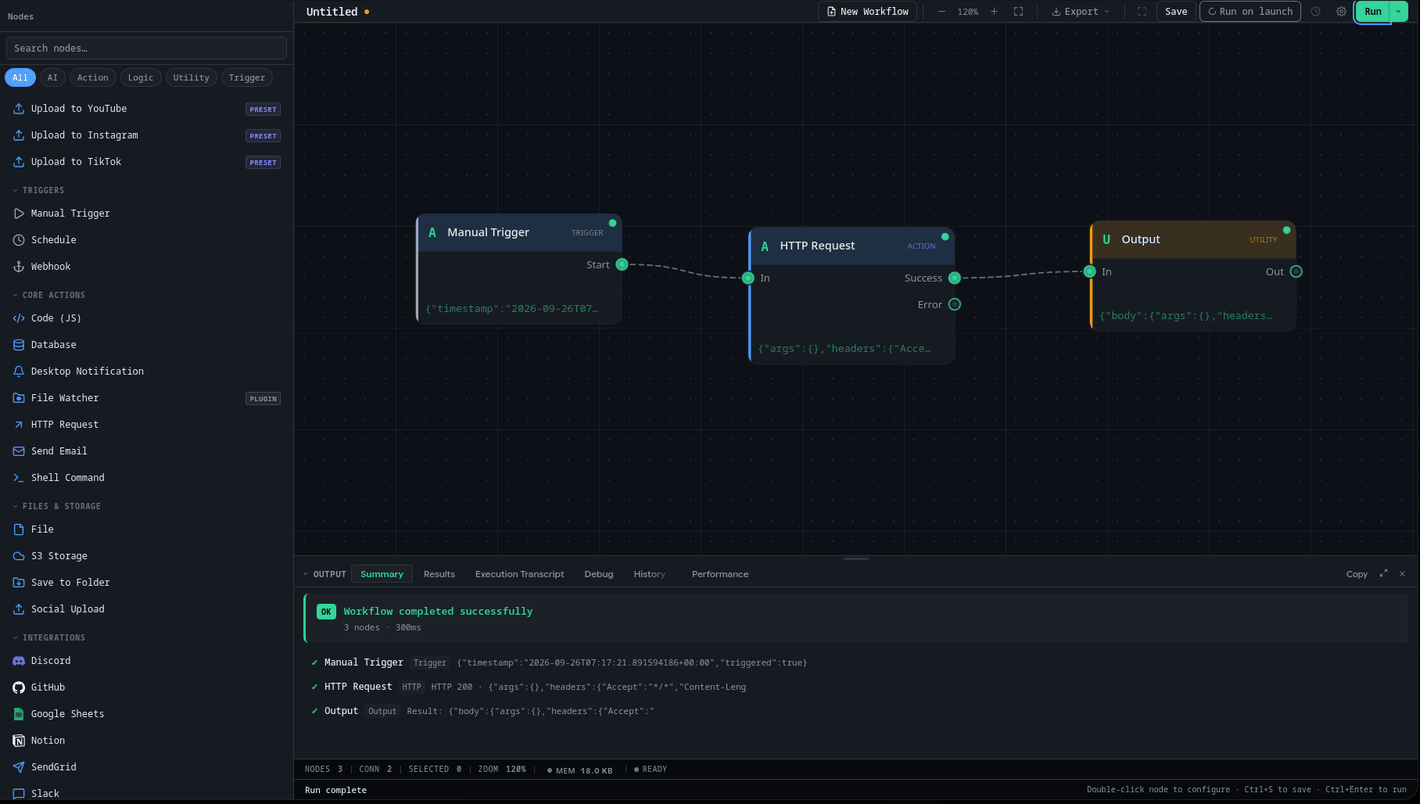
That's one full run, done by hand. Everything after this point is about making it happen without you.
Step 6: Make it run on its own
A workflow that only runs when you click a button isn't really automated yet. To fix that, swap the trigger for one that fires on a timer.
Click Manual Trigger to select it, then press Delete (or Backspace) to remove it, which takes its connection with it. In the sidebar, under Triggers again, find Schedule and click it. Aerini adds new nodes to the right of your existing ones, so Schedule will land past Output rather than where Manual Trigger used to be; drag it over to the left of HTTP Request if you want the row to read left to right again, though where it sits on the canvas makes no difference to how it runs. Connect its right dot to HTTP Request's left dot, the same way you connected things before.
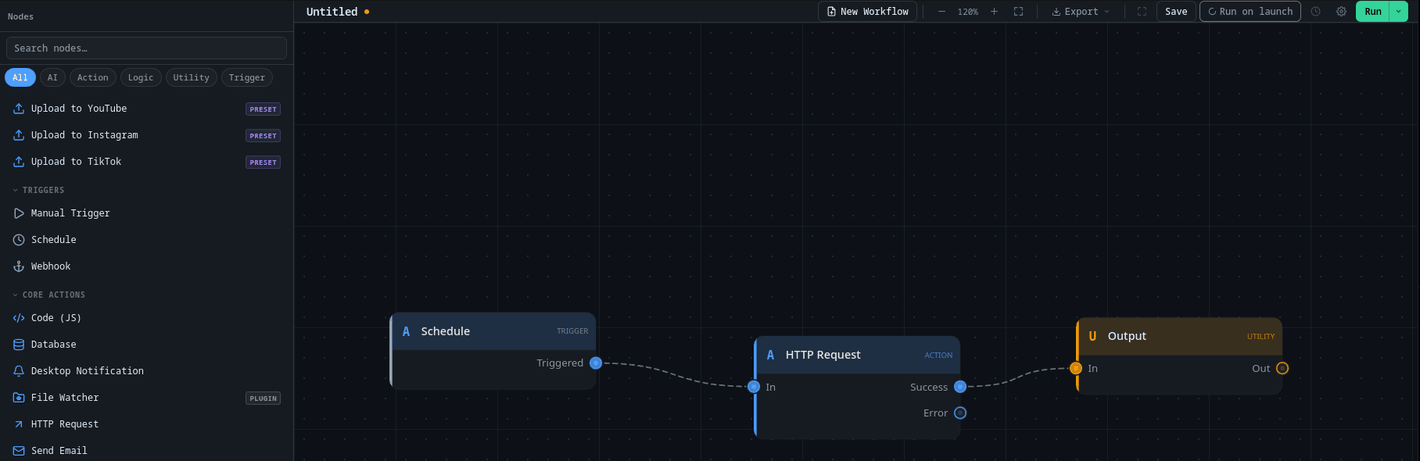
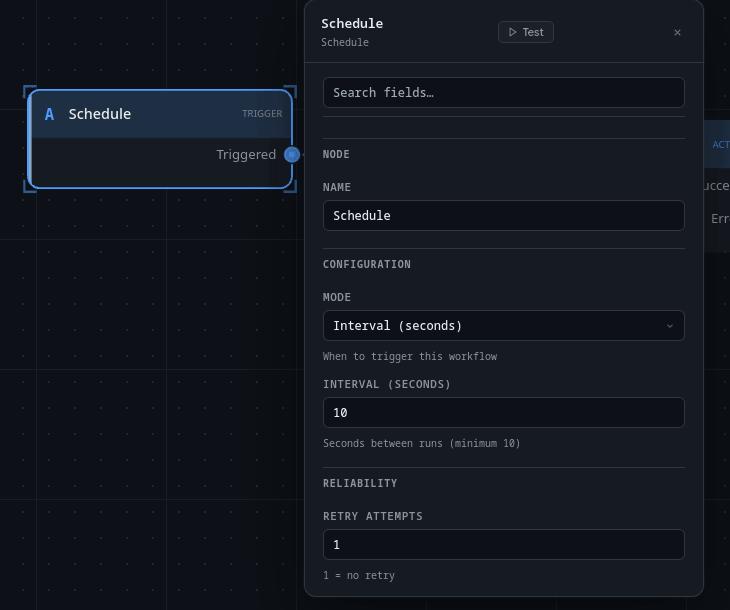
Double-click Schedule to configure it. Set Mode to interval, and Interval (seconds) to 10, the shortest interval Aerini allows. Ten seconds is short on purpose here, so you can watch it fire a few times without waiting around; a real scheduled workflow would more likely run hourly, daily, or on a cron expression instead.
Save again with Ctrl+S (or Cmd+S).
Step 7: Turn on the schedule
Next to the Run button is a small arrow. Click it, and choose Schedule Run instead of the plain Run you used before.
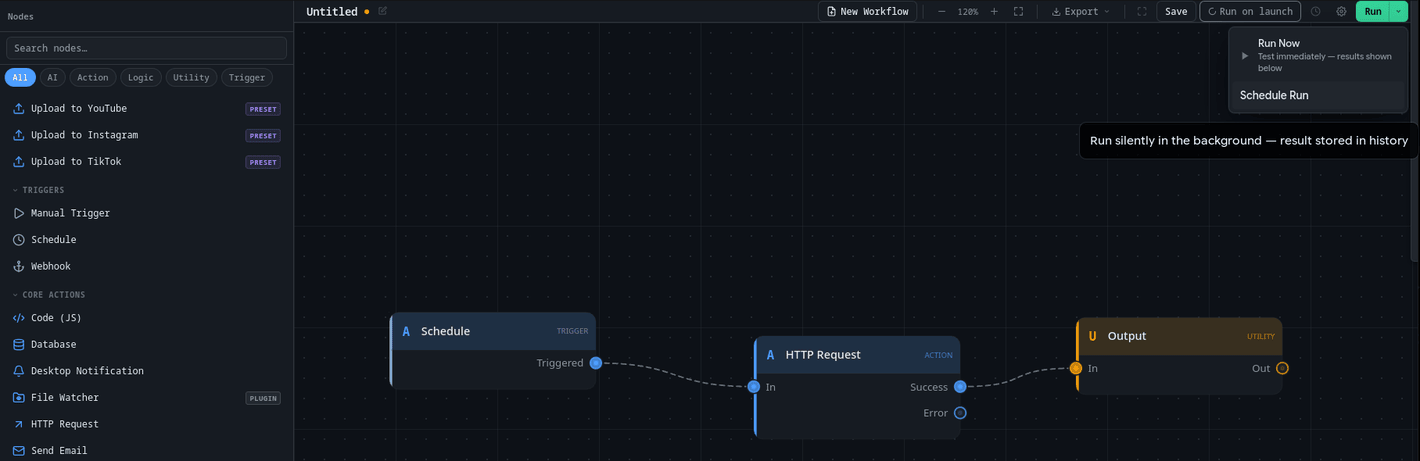
Aerini starts running the workflow every ten seconds in the background, whether or not this window is even open. You can watch it happen from Background Runs in the sidebar, which lists every run as it happens along with whether it succeeded.
Step 8: Turn it back off
Since it's now firing every ten seconds, stop it once you've seen enough. Open the same Run menu and use it again to stop the workflow, or find it under Background Runs in the sidebar and stop it from there.
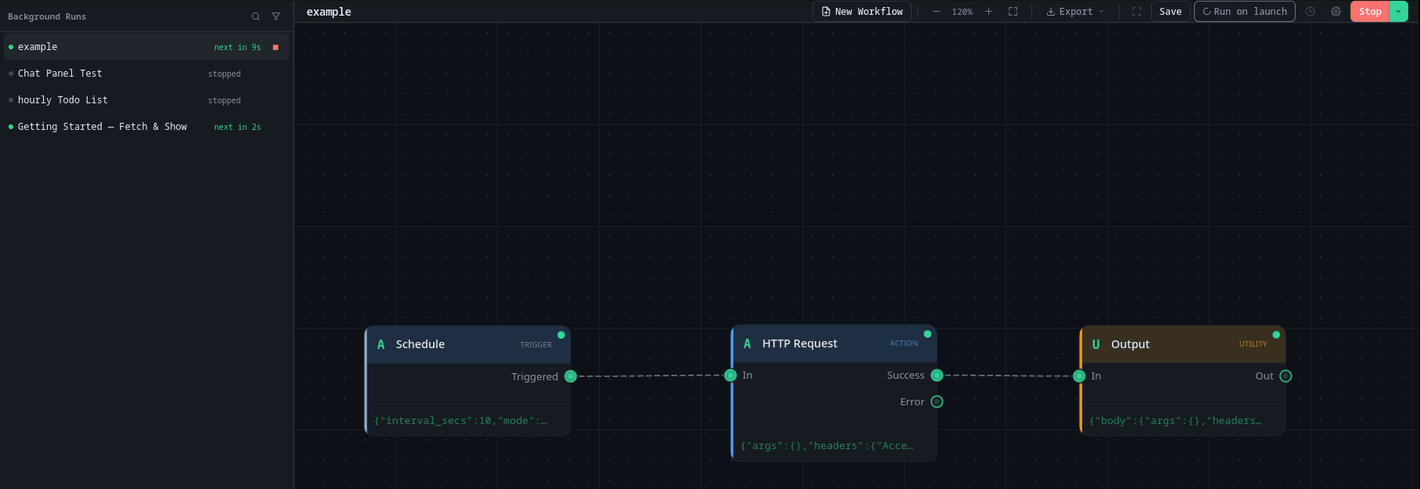
Closing the window doesn't stop it: Aerini keeps running in your system tray even with no window open, so the button or panel above is the actual off switch, not the window's close button.
What you just built
A trigger, an action, and a place to see the result, wired together and run two different ways: once by hand, and once on a repeating schedule. That's the shape every Aerini workflow follows, no matter how many nodes it eventually grows to.
From here:
- Concepts puts a name to everything you just did (workflow, node, connection, run) and explains how they fit together.
- Nodes Reference lists everything else you can build with beyond HTTP Request and Output.
- Keyboard Shortcuts covers every shortcut, including the two you just used (
Ctrl+S,Delete). The same list opens in the app itself by pressing?or clicking Shortcuts in the toolbar. - Background Runs covers schedules and webhook triggers in more depth, including run history.
- Glossary is there for any term that comes up later and doesn't ring a bell.